
Using Command-Line Arguments to Configure In-App Dependencies
I think most developers would agree that using dependency injection to mock data for testing or debugging is a valuable tool in any developers tool belt. However determining which data to mock and under what circumstances can be really challenging, at least in iOS development.
We could hard code flags in our app and manually change them when testing or debugging, but this is super error prone and virtually guaranteed to result in a mocked datasource shipping to the App Store sooner or later. ☹️
We could use Active Compilation Condition checks at run-time to load dependencies based on debug or release build configurations, but this gets hard to manage quickly because all debug builds get the same dependencies. ☹️
What we really need is the ability to configure specific dependencies per Xcode scheme or UI test case without running the risk of accidentally shipping a mocked datasource to the App Store.
Introducing Command-Line Arguments
Let's start by reviewing what command-line arguments are and how to process them in Swift. We'll use the Swift Package Manager to create an executable project which can be built and run from the terminal.
$ mkdir CommandLineArgumentsDemo
$ cd CommandLineArgumentsDemo
$ swift package init --type executable
We can now build and run this executable in the terminal to see the default implementation in action.
$ swift build
$ .build/debug/CommandLineArgumentsDemo
> Hello, world!
Great! Now let's generate an Xcode project so we can start experimenting with command-line arguments in Xcode.
$ swift package generate-xcodeproj
$ open CommandLineArgumentsDemo.xcodeproj/
Modify main.swift to replace 'Hello, world!' with a custom greeting using command-line arguments. i.e. --greeting 'Goodbye, pluto!'
// main.swift

// Determine if `--greeting` argument is present.
if let commandIndex = CommandLine.arguments.index(of: "--greeting") {
    // Get next index and ensure it's not out of bounds.
    let valueIndex = CommandLine.arguments.index(after: commandIndex)
    if valueIndex >= CommandLine.arguments.startIndex
        && valueIndex < CommandLine.arguments.endIndex
    {
        let greeting = CommandLine.arguments[valueIndex]
        print(greeting)
    }
} else {
    print("Hello, world!")
}
Let's test it out. Save main.swift, then back in a terminal rebuild the project and run it first without, and then with, the --greeting option.
$ swift build
$ .build/debug/CommandLineArgumentsDemo
> Hello, world!
$ .build/debug/CommandLineArgumentsDemo --greeting 'Goodbye, pluto!'
> Goodbye, pluto!
Success! That's great but all that command-line argument boiler plate parsing is tedious and error prone. Here's a few extensions I've created to help out.
extension CommandLine {
    struct Option {
        let commandArgument: String
        let valueArgument: String?
    }

    static func option(for commandArgument: String) -> Option? {
        guard let commandIndex = CommandLine.arguments.index(of: commandArgument) else {
            return nil
        }
        let valueArgument = CommandLine.arguments.element(after: commandIndex)
        return Option(commandArgument: commandArgument, valueArgument: valueArgument)
    }
}

private extension Array where Element: Hashable {
    func element(after index: Index) -> Element? {
        let nextIndex = self.index(after: index)
        return self.element(at: nextIndex)
    }
    private func element(at index: Index) -> Element? {
        guard index >= self.startIndex else { return nil }
        guard index < self.endIndex else { return nil }
        return self[index]
    }
}
With the above extensions added to the project our main.swift file can be simplified considerably.
if let greetingOption = CommandLine.option(for: "--greeting"),
    let greeting = greetingOption.valueArgument
{
    print(greeting)

} else {
    print("Hello, world!")
}
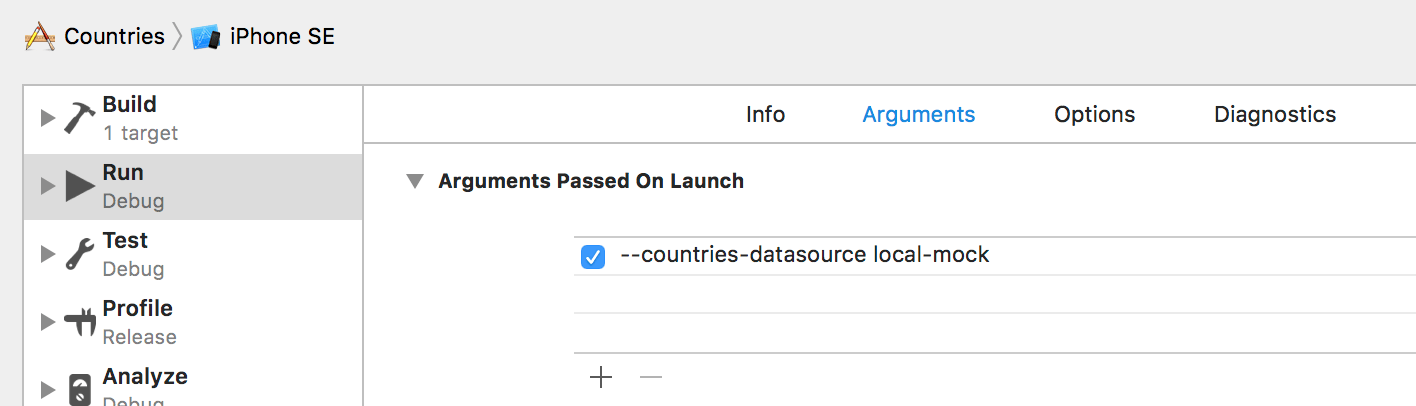
Last but not least, Xcode allows us to define command-line arguments per scheme which get passed to our app when we run inside Xcode. This means we can skip the manual build and run steps in the terminal. Here's how to configure it:
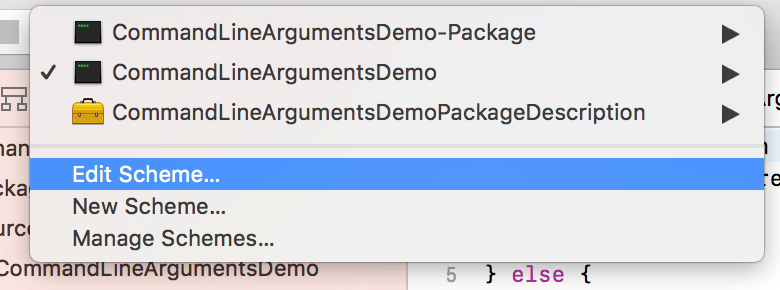
- Select the CommandLineArgumentsDemo scheme from the scheme selector ensuring My Mac is the selected device.
- Select Edit Scheme....
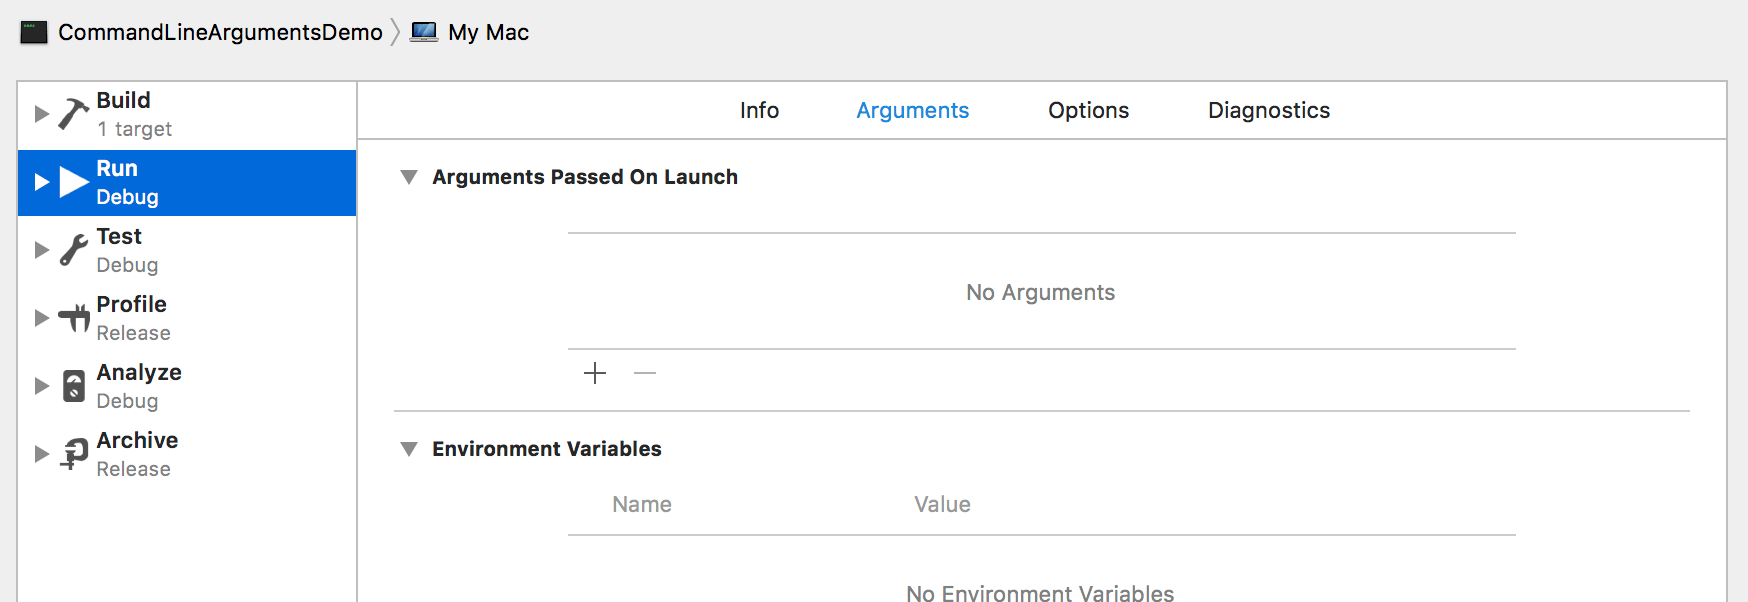
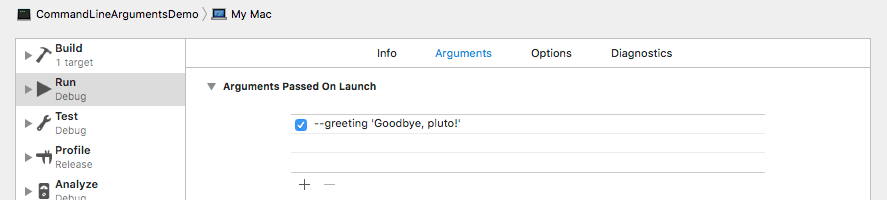
- Select Arguments tab.
- Add a
--greeting 'Goodbye, pluto!'argument using the plus icon in the Arguments Passed On Launch section.

Now run the program in Xcode via the run button in the top left. The console inside Xcode should display.
Goodbye, pluto!
Program ended with exit code: 0
Now disable the argument by re-opening the scheme editor and unchecking the greeting argument. Run again and check out the console.
Hello, world!
Program ended with exit code: 0
Brilliant! ...but how is this useful to iOS app developers?
Testing, that's how!
Whether we're talking about manual testing or automated UI testing, using command-line arguments to configure app dependencies can speed up the work flow significantly.
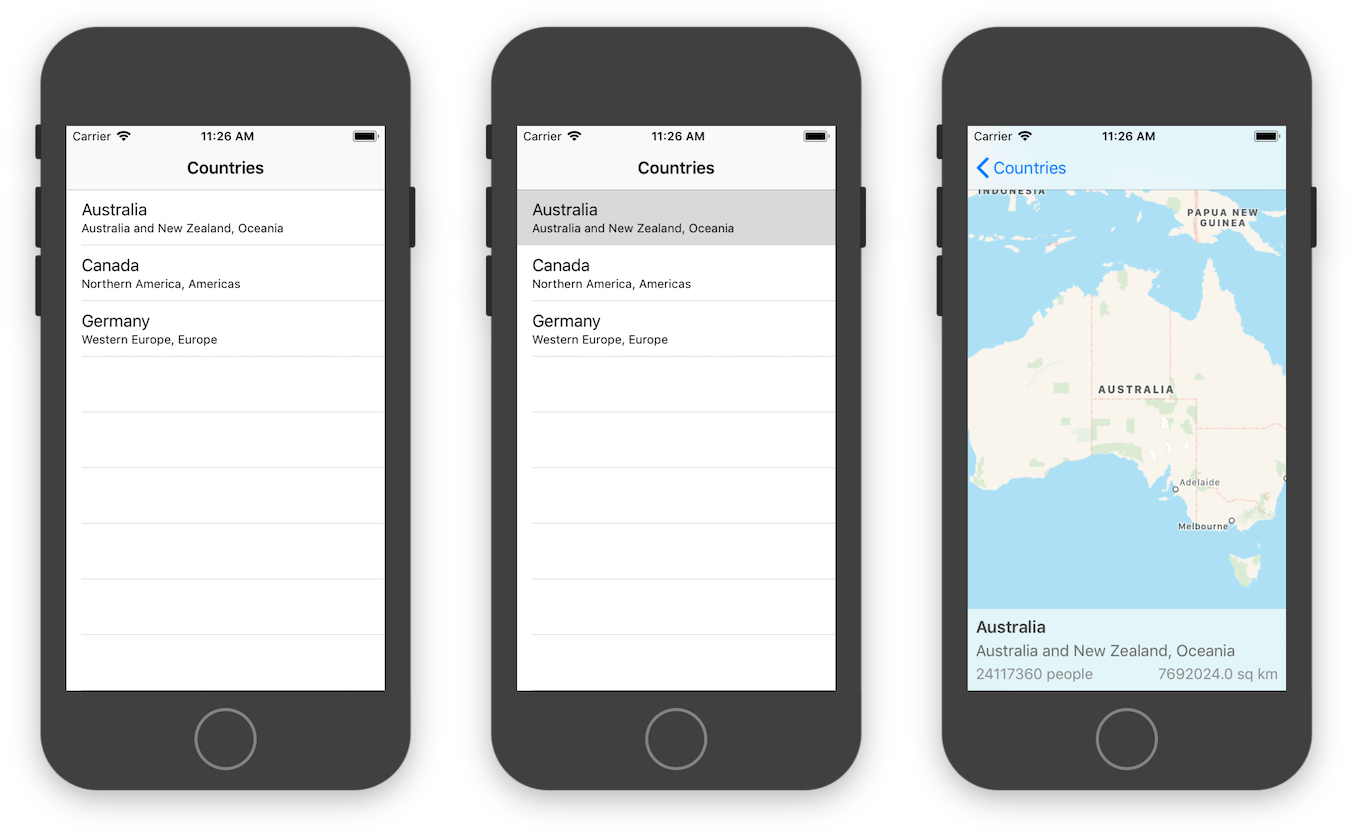
So what exactly does this look like? Let's see with a simple iOS app called Countries demonstrating the technique.
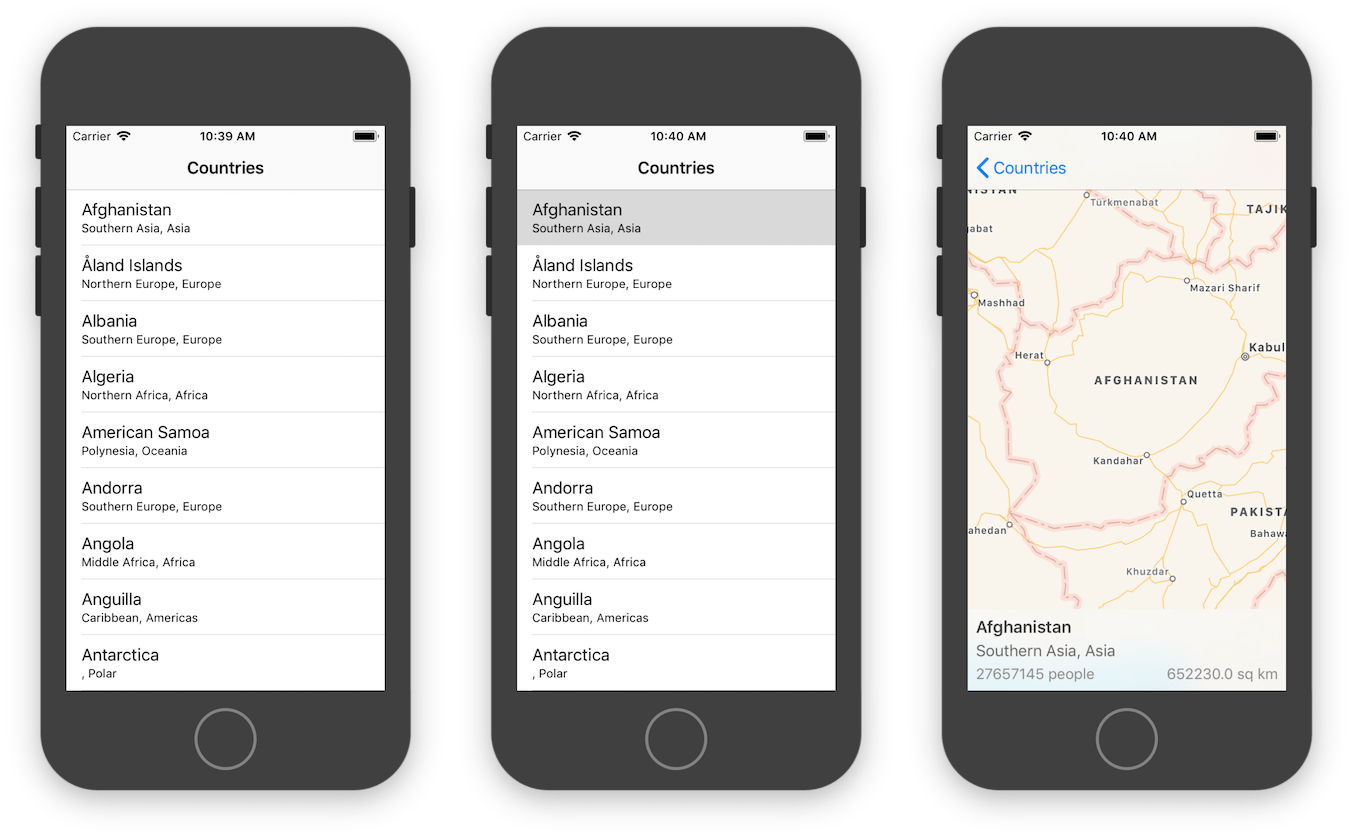
Countries displays a list of, you guessed it, countries. Selecting a country in the list shows details for that country.
In order to make both manual and automated testing more reliable a CountriesDatasource protocol has been used throughout the app allowing different implementations to be used in different contexts. The RESTCountriesRemoteDatasource implementation fetches data over the network from the REST Countries API. The LocalMockCountriesDatasource implementation returns predefined mock data without requiring the internet.
The full project is available in our GitHub repo, but we'll cover the important bits here.
The main thing to realize is the ViewControllers don't have any fetching logic directly in them. They simply have a reference to one of the CountriesDatasource implementations which fetches the data for them. They don't even know which implementation they have because, quite frankly, it's none of their business.
// CountriesViewController

private func fetchCountriesAndUpdateUI() {
    Providers.countriesDatasource.fetchCountries(resultQueue: .main) { result in
        switch result {
        case .failure(let error):
            self.present(error: error)

        case .success(let countries):
            self.countries = countries
            self.updateUI()
        }
    }
}
Now here's the magic...
The Providers type has a static countriesDatasource property which is lazily instantiated from the provided closure on first access. This closure uses command-line arguments to determine which CountriesDatasource implementation to provide. Super simple!
// Providers

static var countriesDatasource: CountriesDatasource = {
    guard
        let datasourceOption = CommandLine.option(for: "--countries-datasource"),
        let datasourceName = datasourceOption.valueArgument
        else { return RESTCountriesRemoteDatasource() }

    switch datasourceName {
    case "local-mock":
        return LocalMockCountriesDatasource()

    default:
        fatalError("Unknown countries datasource requested: \(datasourceName)")
    }
}()
Update the Xcode scheme with the appropriate command-line arguments and voilà, we can quickly and easily mock the datasource for debugging and/or manual testing.
Automated UI Testing
Due to the way Xcode runs UI Tests the scheme defined launch arguments will not be present when executing test cases. So how can we provide launch arguments during UI Tests? We programmatically add them to the XCUIApplication instance for each individual test case. Here's an example:
// CountriesUITests

private var app: XCUIApplication!

override func setUp() {
    super.setUp()

    app = XCUIApplication()
    app.launchArguments = [
        "--countries-datasource", "local-mock",
    ]
    app.launch()
}
Before each test case is executed an instance of XCUIApplication is instantiated, provided our launch arguments, and launched. This enables us to pick and choose which mocks are included for each individual test case. Fantastic!
Note: XCUIApplication() requires each argument be added as a separate element in the array. This is in contrast to Xcode's scheme editor which allows us to add multiple arguments per line.
Then we write our UI tests as usual.
// CountriesUITests
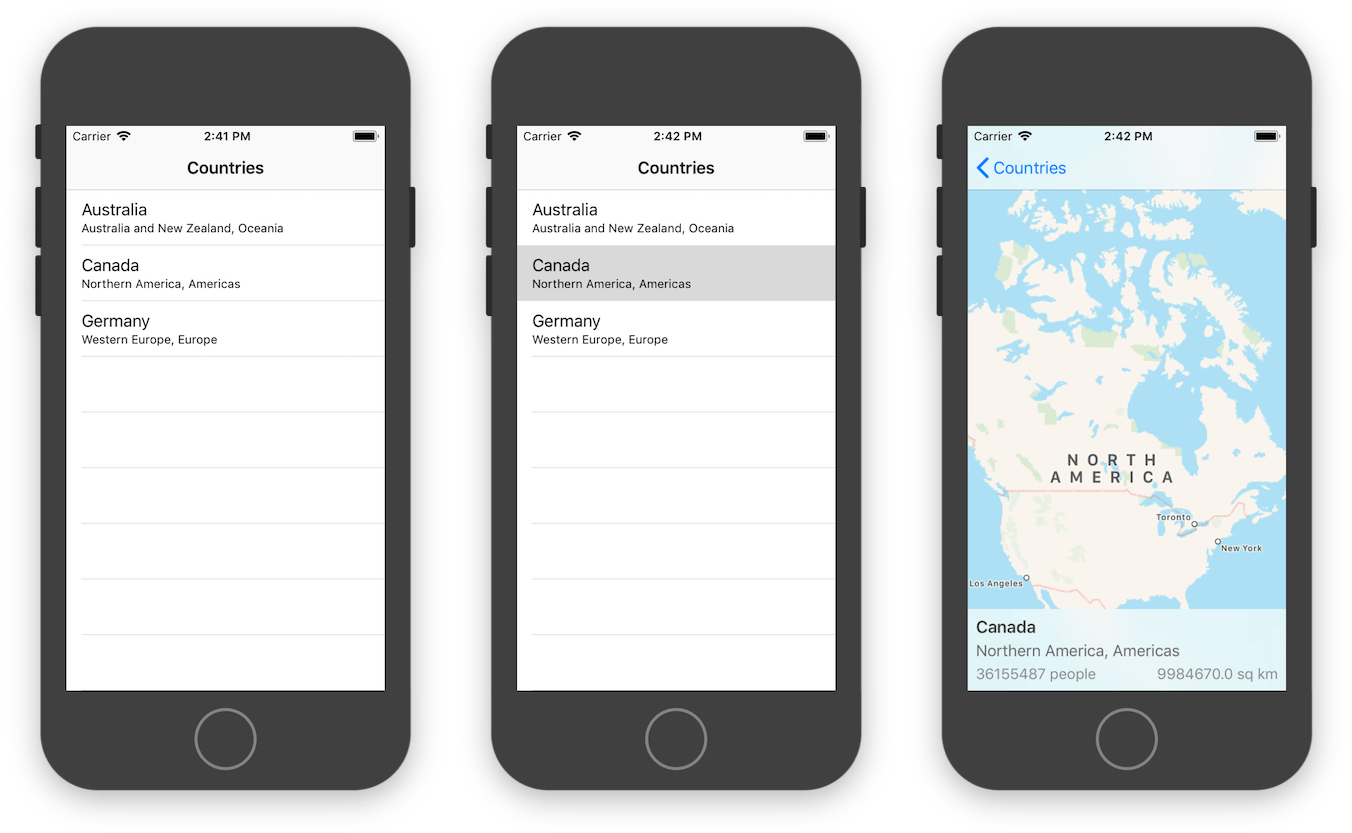
func testCountryDetailsDisplayedOnTap() {
// Add a screenshot of the Countries screen to the test report.
attachScreenshot(withName: "Countries")
// Select the Canada row.
app.tables.staticTexts["Canada"].tap()
// Wait for details screen to be presented.
guard app.staticTexts.matching(identifier: "countryName")
.firstMatch.waitForExistence(timeout: 5.0)
else { return XCTFail() }
// Add a screenshot of the CountryDetails screen to the test report.
attachScreenshot(withName: "CountryDetails")
// Get the text label values to compare to our expected results.
let name = app.staticTexts.matching(identifier: "countryName").firstMatch.label
let region = app.staticTexts.matching(identifier: "countryRegion").firstMatch.label
let population = app.staticTexts.matching(identifier: "countryPopulation").firstMatch.label
let area = app.staticTexts.matching(identifier: "countryArea").firstMatch.label
// Assert the actual values match our expectations.
XCTAssertEqual(name, "Canada")
XCTAssertEqual(region, "Northern America, Americas")
XCTAssertEqual(population, "36155487 people")
XCTAssertEqual(area, "9984670.0 sq km")
}
private func attachScreenshot(withName name: String) {
let screenshot = app.windows.firstMatch.screenshot()
let attachment = XCTAttachment(screenshot: screenshot)
attachment.lifetime = .keepAlways
attachment.name = name
add(attachment)
}
Wrap-up
No solution is 100% good or bad; it's all about trade-offs. So let's talk pros and cons.
What I like about this approach:
- The ability to easily mock data in UI Tests.
- The ability to specify exactly which data gets mocked per scheme or test case.
- The mocks will never be accidentally used in production because App Store builds will never have these command-line arguments present.
What I don't like:
- During development it's easy to forget which command-line arguments are enabled, which can lead to the occasional "what is going on" moment.
- Xcode's scheme editor is a little inconvenient to access and prevents copy/paste from the code while it's open.
- The command-line arguments defined in the scheme are only provided when launched from Xcode, they are not present when manually launching the app later from the home screen.
On the whole this is the best approach to in-app dependency configuration I've tried yet. The pros for me far outweigh the cons. I hope you enjoy it as much as I do.
Cheers! 🙂